Monday, February 28, 2011

Nooooo!!!!

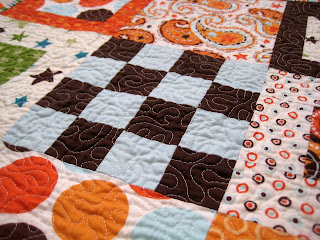
An exercise in free-motion quilting.

Somehow, I got myself boxed into the middle.

And then . . . .


. . . with literally less than 1 square inch, I ran out of bobbin.

Then I looked up . . .


{Don't mind the dust.}

On a better note.  Between loads of laundry this weekend, I finished cutting out my Halloween Kaleidoscope quilt . . .


 . . . and got some chain piecing done.


Now, I just need a space large enough to call a design wall/floor to lay this puppy out.

Happy quilting.

Thursday, February 24, 2011

Little Rock meets NYC

Scraps from my Central Park jelly roll +
Arkansas Crossroads block pattern =
one lovely pillow cover


With envelope back where the print matched before I put the pillow form in.


The fun thing about having two sewing machines around (remember, one is "for the girls") is that when I get bored with quilting when I'm right in the middle of the quilt, I can leave it on one machine and pull out the other to play with scraps.


This really is square in real life.

And note to self: Do not attempt to fussy cut fabric with the one brain cell I have left after 9:00 p.m.

Wednesday, February 23, 2011

Central Park Quilt

It's done!  Beautiful, spring-like colors for an almost-spring-like day.  (The weather is just teasing though . . . it's supposed to snow tomorrow.)


Can you see the seam on the back?


Now can you?  Check out this post to see how I did it.


No hand-work for me.  This is machine bound following this tutorial with some modifications.


Fabric: Central Park by Kate Spain for Moda Fabrics and Kona White
Pattern: Flipside by Rachel of p.s. i quilt
Finished size: about 58" x 58"


And now a joke from my 3rd-grader: "What did the thread say to the spool?  I'm all wound up."
Happy quilting!

Saturday, February 19, 2011

Halloween in February???

Why not?  We celebrate "Christmas in July".


7 more stacks to go and then piecing will commence.

Friday, February 18, 2011

"One Line A Day" Cover

Have you seen this book around blog-land?


It is a fun little journal that allows you to write just a few lines each day.  However, there is space on each page for 5 consecutive years.


I finally procured a copy earlier this month.  As I tossed it in my diaper bag for a quick road trip last weekend, I became worried that it would be damaged.   So I created a cover to protect my little journal.


Here's a tutorial:

Begin with 2 pieces of fabric (one for the outside and one for the lining) that are 11" x 11.5".  This allows a generous size so you can stick a pen in there too.  Cut out a 3" square from both of the top corners.


Do this for both the outside and the lining.


Stitch the edge seam to create a tube.  On the lining, leave a 2-3" gap so you can turn it right side out when it's complete.


While it is folded in half, trim a little rounded curve from the flaps corners.  Trim the lining too.


Press open the seam, center the seam and then stitch across the bottom.


Pinch the bottom corners to create a triangle with the bottom seam centered down the triangle.  Stitch perpendicular to the seam about 3/4" from the point.  This will create the bottom of a "box".  Do this to both corners of both pieces.


Trim the corners down to 1/4".


Turn the lining right side out and slip it into the outside piece.  Pin and stitch all around the opening.  Don't worry.  Remember that we left an opening in the lining.


Clip the corners and notch the curves.


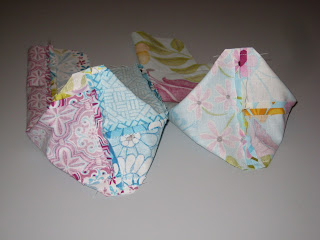
Pull out the lining.  It should look like the pictures below.


Through the gap in the lining, turn the whole thing right side out.  Tuck the lining down into the outside.


Press.  Top stitch.  You could also add a fastening of your choice (snap, button, hook & loop).


Slip your journal and a pen inside and enjoy!

Thursday, February 17, 2011

Central Park Top Done

After a few days of spring-like weather, old man winter reminded us that he is still in charge . . . at least for a few more weeks


5" of snow definitely warrants some spring-like quilt colors.


Pattern in based on Rachel's (of p.s. i quilt) Flipside quilt.


I had fun fussy cutting the corner stones.


Love the colors of the Central Park line by Kate Spain for Moda.


I experimented with "pressed open" seams.  I've always been a "press to one side" kind of gal.  It seems like everyone has an opinion on how it absolutely must be done.  I think it's all a matter of preference.  Although it took longer to open up those seams, I found that my seams didn't warp as much, nor did I lose as much fabric into the fold of the seam.


A taste of spring on a wintery day.


Basting and quilting will commence this afternoon.

Tuesday, February 15, 2011

A Little Lovey

Every boy needs a little blankie to carry around.  (Just ask my 11-year-old who still sleeps with a square of flannel.)


Since Joe's quilt was a bit large to be dragging everywhere, I made him a little lovey to carry around from the scraps of his quilt.


This baby is about 18" square.  Free-motion quilted.


I added loops of ribbon into the binding.  I cut the ribbon at 5", folded them over, sewed them to the back of the quilt as I put the binding on the front, and then pulled them out and stitched them down when I sewed the back of the binding on.


A mini-me.

Wednesday, February 9, 2011

Pattern Matching

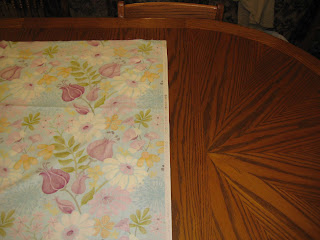
I bought a length of this beautiful large scale print from the Central Park line (by Kate Spain for Moda) for the back of my quilt, but wanted to match the print since a mismatch would be pretty obvious.  Here's how . . .

Purchase enough fabric for the length of your quilt twice, plus a little extra to match the print.  There are ways to calculate this, but I just got lucky ;).  Cut it in half across the width of fabric so you have two full-width pieces approximately the same size.  Lay them side by side and do an approximate pattern match.


Fold the right piece over onto the left one.


Fold back the fabric to a chosen spot in your print.  I used the edge of the yellow cornflower, the tips of the blue "puff ball", and pieces of the green leaves as "matching points" down the length of my fabric.


Line the prints up along the edge of the fold and pin it.  Lots.  Lots and lots of pins while matching the prints down the length.


Now, stitch through all three layers (the two from the folded piece of fabric and the one below).  Stitch as close to the fold as you can.


You are actually stitching on the "back" of your piece.  A majority of your fabric is to the left with right sides together.

See how matchy, matchy it is already looking . . . and this is still the back!


Now trim the excess fabric down to about 1/2" on each side.  In the photo below, the main pieces of fabric are under the cutting mat.  Look at the leaf part of the print to see the stitching.


Now open your main pieces and give it a good press.  I still need to press the piece below, but you can already tell how the seam will disappear when it is ironed and then quilted.


Doesn't it make your perfectionist heart sing?

Tuesday, February 8, 2011

Joe's Quilt is Finished

It's done . . . before he can even roll over ;)


I ended up stippling.  I need a walking foot before I attempt straight line quilting again.


I pieced the back too precisely, which meant it ended up being too small.  I added what I had left . . . blue.  I wish I had at least split up the blue with a couple of little pieces of brown, but if "wishes were fishes we'd all have a fry." 


I almost like the back better than the front.  Almost.


All in all, I'm rather pleased.  Do you think maybe Joe is too?


Quilt Stats:
Size: 43" x 52"
Fabric: All Stars 2 by Riley Blake (bound with the stripes of the same line)
Kona Chocolate and Kona Baby Blue
Pattern: Chain Linked by Amy Smart of Diary of a Quilter