Monday, January 31, 2011

How An Idea Grows

I have yeast for brains.

I was browsing this book . . .


And came across this idea . . .


So I thought to myself, "Self . . . wouldn't it be fun to do each letter with a novelty print that starts with that letter."  I scoured my stash and came up with these.  I've since purchased a few more.  But, it doesn't end there, no.


I thought, "wouldn't it be fun to do an entire I Spy quilt out of prints arranged alphabetically."  What was I thinking!!!  Anyway, I've started to organize my collection in sleeves alphabetically ;).  But, it doesn't end there.


Since I knew that would be a large undertaking, I've been fussy cutting little 2" squares to make I Spy blocks to use as the back of each page of my ABC book.  I'll post a picture sometime.

See . . . yeast for brains.  Stick an idea in there and it rises and grows and even ferments a bit.

On another note . . . Joe is 4 months old already.  Guess I ought to finish quilting the rest of this quilt, since he no longer fits in the space I have quilted.

Thursday, January 27, 2011

Valentine Crafting Spree

I am avoiding quilting Joe's quilt.  There, I said it.  Hence, the plethora of Valentine's crafts I've been pumping out the last few days.

Button collage.  A hot glue gun has been added to my list of "tools that are too dangerous for Sonia to use."


A Valentine pennant banner with fabric triangles purchased online.  (I really need to get some fancy molding around that window . . . oh, and clean those icky, icky blinds.)


Here's progress on my Giddy table runners.  Check out the quilting.  Tee, hee, hee.  I'm not usually a heart fan, but for Valentine's Day I ought to make an exception, right?


Work-In-Progress.


Now, back to Joe's quilt.  I could try some free motion stars as shown below.  Someone suggested straight line quilting straight through the quilt--not following the optical illusion.  The ideas are simmering.  Guess I ought to just get to work.


The three stars at the top and the meander on the right were done by my 5-year-old.  I love that she is not afraid to try new things!

Monday, January 24, 2011

A Valentine's Table Runner

Another WIP (just what I needed).  This cute little baby will be receiving some quilting and some stunning RED binding in the coming days, but I couldn't wait to share.


From a Giddy charm pack (by Sandy Gervais for Moda) I selected 7 squares.


I ironed them on fusible web and traced the biggest heart I could create. (I cut out a 5" square, folded it on the diagonal, and cut the top of the heart.)  Traced around a little cup to use up the rest of the square.


I arranged them on a 14.5" x half-a-width-of-fabric background piece, fused them, and stitched around them using a dark colored thread and the blanket stitch on my machine.  For the borders (I didn't take pictures, sorry), I selected 7 more squares, cut them in half, and sewed them in two sets of seven.  Pretty easy, refer to the picture above.  I'm working on another one with the browns and pinks from the same charm pack.  hee hee hee.


On another note, my son was supposedly taking pictures of his science fair experiment.  I found a bunch of these instead . . . turkey.

Bliss Quilt Complete

Mission Accomplished.  I work well on a deadline.  Thanks, Amy, for hosting the "One Thing, One Week Challenge."  My goal was to finish the quilting on this quilt  (so I could retrieve my basting pins).


Here's the quilting . . . in all its puckered glory.  My straight line quilting needs a lot of practice . . . or a walking foot.


As a bonus, I even got it bound.  Now I just need to figure out who I'm going to give it to ;)


Quilt stats:
Fabric: Bliss charm pack by Bonnie & Camille for Moda, Kona Rich Red, Kona White, bound in a Riley Blake stripe
Size: 44" x 52"
Pattern: Chain Linked by Amy Smart of Diary of a Quilter

Now that the pins are retrieved, I can finish Joe's quilt.  I'm tired of cringing every time I take a picture of my cute BOY on this very GIRL colored quilt.

"Uhh, mom, I don't do pink."

Thursday, January 20, 2011

Workshop in Progress: Thread Color & Quilting Design?

I'm linking up to Cheryl's Workshop in Progress on Naptime Quilter.  I love to quilt, but I don't love the actual quilting . . . I never feel confident in choosing thread color and design.  And frankly, I don't practice enough for my quilting to ever look good to me.  I always have to remind myself of my mother's mantra, "It looks good from the stage."  In other words, no one is ever going to see my tiny mistakes.
Anyway, here's my workshop delimma.  I made the red quilt just for fun (based on Amy's "Chain Linked" pattern from Diary of a Quilter) and loved it so much that I decided to make my baby's quilt from the same pattern.

Here's how I've done the quilting on the red quilt.  Straight line quilting outlining the shape of the optical illusion and around each square.  I'm thinking of adding another "set" of squares inside each square too (in fact, convinced that I will.)  I find this process rather tedious . . . stop and turn at each corner, but I do like how it looks.


So my question is, should I use the same pattern on Joe's quilt?  The back is a bit busy (shown below).  Or should I just stipple all over (to accomodate the back and to get it done faster)?  Either way, what thread color should I use?  My instinct is to take the time to straight line quilt it with a dark brown thread, but wonder if I should switch to a light blue thread on the light blue parts.  If I stipple, would a dark brown work, or should I try for a lighter brown?


Thanks for your input!

Monday, January 17, 2011

The "One Thing" Challenge

Last night, I was in "think-about-everything-you-have-to-do" panic mode.  The best therapy: write it all down.  This side is just my unfinished quilting projects.  The other side has everything else ;)

See what it says? "Cathartic or panic-inducing?"  I'm embarrassed to say that there's nearly 20 projects on there.  Some are so close to being done . . . like an hour of quilting or even just the binding . . . and others are still in just the "I purchased fabric for this idea" stage.

I woke up this morning to find Amy's (of Amy's Creative Side) One Thing, One Week Challenge.  Just what I needed . . . a chance to focus on just one thing.


Amy's Creative Side


So, here's my goal for the week.  I'm going to finish quilting this quilt.  It may look familiar.  It was the "test run" for Joe's quilt.  Or maybe it was just so fun to make that I needed to make one that would match one of my family members.


Besides, I need the pins so I can finish Joe's quilt.

What's your one thing?

Wednesday, January 12, 2011

Joe's Quilt Top Finished

After a bout with the stomach flu this week (me AND the kids), I finally got back to sewing today.  Here's the finished quilt top.


I was trying to use what I had left over from the front to complete the back.  This isn't turning out as awesome as I had envisioned it would be, but I guess it's okay for a back.


Here's the finished "Joe" block.


And progress on piecing.  I really wanted to finish this today, but I'm ready to hit the sack ;)


And if you ever wonder what to do if the tooth fairy forgets to visit . . .


. . . a teeny-tiny note.  She was totally thrilled.

Monday, January 10, 2011

Hexagons

Today, I wanted to work on this quilt, but Joe wanted to be held while he was sleeping.  On occasion, I accommodate him (we all know how fast babies grow up).  I keep a box of handwork near my chair for just such occasions.


These hexies are for some pillow covers.  I made one pillow cover and will be re-quilting it (insert evil, perfectionist laugh) before I show it off.  Here's the next set.


So today, I give you . . . "Tutorial From a Chair"

I cut a 5" charm pack into 4 - 2.5" squares.  No need to cut out hexagons.  I used the "hexagon cutting guide" on www.paperpieces.com to figure out what size of hexagon (as measured along one side) I needed to match my square.  I used this website to print 1" hexagons onto cardstock.  If you don't want to cut them out yourself, you can order them from Paper Pieces, but I wanted them right away.


I punch holes in each of my templates for easier removal later.  So here's how to create a hexagon . . . pin a paper template to the center of your square of fabric.  Use a short length of thread doubled over with the "fold" at the end . . . no need for knots, just take your first stitch and catch the loop.


Begin by folding over the first two edges, making sure that the folds are nice and snug against the template.  Take a little stitch over where the two flaps meet (this first one is where you just hook your thread through the loop).


On subsequent corners, fold over an edge, stitch and then stitch again in the same spot so the thread wraps all the way around the fabric. Continue around the hexagon, ending with another double stitch where you started.  No need to knot here either . . . these stitches are just holding it together until you can whip stitch them to another hexagon (we'll tackle that how-to another time).


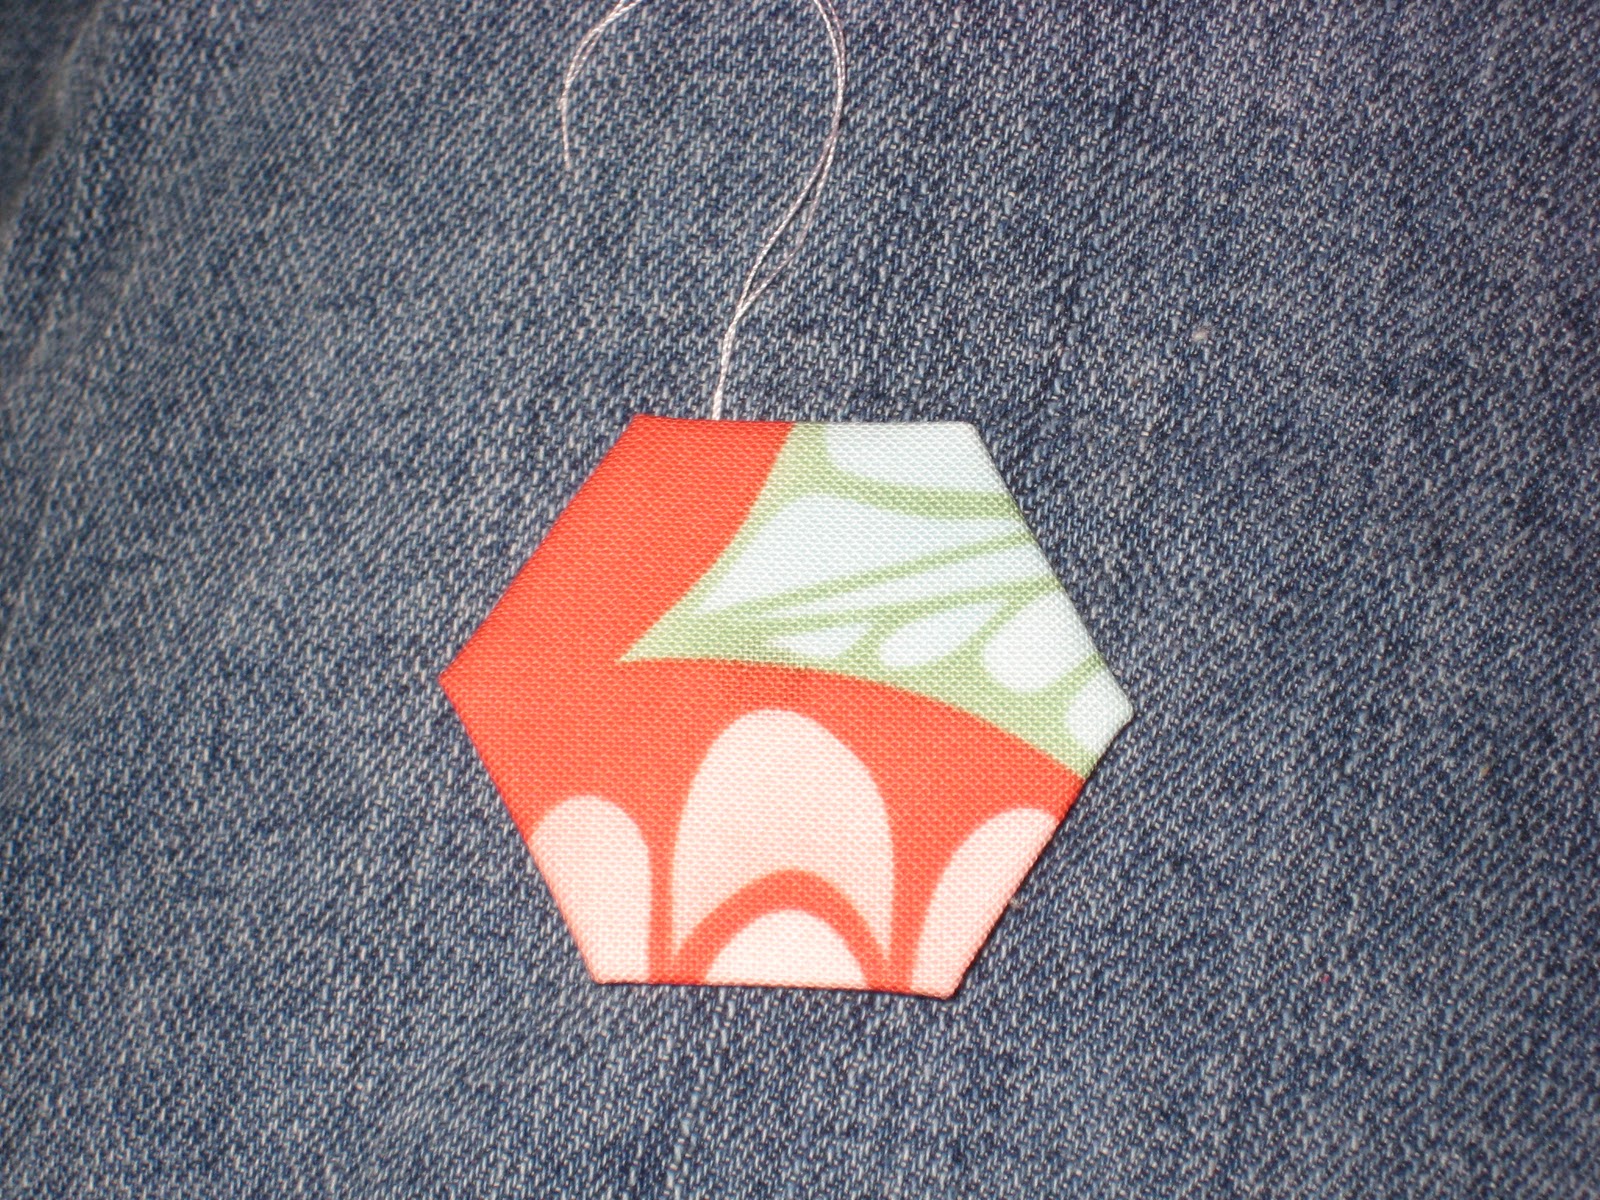
Here's the finished product and below is what I accomplished "while Joe was sleeping".  Not bad for stitching while holding a baby.
 

Fabric is Fandango by Kate Spain for Moda Fabrics.  I kind of regretted chopping up those big, beautiful prints for such a tiny project, but I've savored the slow process of hand-piecing these gorgeous colors.

Saturday, January 8, 2011

Training Her Young

Our family got a new-to-us sewing machine for Christmas.  5-year-old Kristine was itching to use it and started begging to make a quilt.  I said, "What kind of quilt are you going to make?  Draw a pattern."


Okay, a Christmas quilt.  I had some cheapy Christmas scraps to cut up for her.  She laid it out and said, "It needs white stuff in between."  I cut up white strips for her.  I'm a little bit of perfectionist and control freak, so I stood over her and guided the fabric while she pushed the pedal.  "Stop, stop, stop. Okay, go.  Hey, pay attention . . . go."

After she went to bed, I started quilting it when my last needle broke.  I took it as a sign . . . Kristine needed to quilt it.  Deep breath, relinquish control.


She spent the next few days testing out all the fancy stitches on our new machine . . . one inch of blanket stitch, one inch of snowflakes, couple inches of zig zag, a few spots where it got stuck and she kept sewing leaving a big clump on the back.


I think she just liked pushing the buttons.  I was tempted to unpick a few spots like these pucker spots, but I resisted.


I finally convinced her to straight stitch down each row of sashing just so I could get my pins back.  She still wants to decorate each square, but for now I think she has lost interest.  Doesn't she look proud?


Friday, January 7, 2011

Making Progress

I've continued with my goal to finish one quilting thing each day.  Today I got the vertical lines pieced.  After I lay my quilt out, I fold over sets of blocks and then stack them in vertical column piles.  I can "chain stitch" entire columns and then stitch columns together until the entire top is pieced.


Tomorrow is ironing and horizontal seams . . . maybe.  I may need to pause and tackle that mountain of laundry.  The back is going to be pieced from leftovers of the fat quarters . . . that idea has been percolating and evolving all day.  I can't wait to tackle it!

Thursday, January 6, 2011

Joe's Quilt

I was able to cut the blocks . . .


. . . and get them laid out.  Stitching will have to wait until tomorrow.  It's been a busy day.


Fabric is All Star 2 by Riley Blake, Kona Baby Blue, and Kona Chocolate.
Quilt design by Amy of Diary of a Quilter.

Wednesday, January 5, 2011

Red & Aqua Experiment and a Bonus Finish

This was another quilt that stalled because of a mistake I was worried about making.  I hadn't even made the mistake yet and I put the quilt away!!!  I had gone so far as to quilt the middle with a stipple and was working on quilting the border with some closely-spaced straight lines.  I was 3/4ths of the way through the border when I began to worry about how the lines would match up when I got all the way around.

So today I finished the quilting, bound it, and got it nice and crinkly in the wash.


And guess what . . . the quilting lines worked out just fine.


As a bonus for today, I turned this pile of fabric . . .


into this pile of pieces and then . . .


into this pile of strips.


My goal for tomorrow: turn that pile of strips into blocks.